If you are new to sourdough or an experienced baker but have yet to try your hand at making baguettes, you’ve come to the right recipe! I shied away from making sourdough baguettes for so long because every recipe I read either measuring in grams (my scale died) or complex kneading and stretching and folding techniques that overwhelmed me. These easy no knead sourdough baguettes are not fussy like that. I keep this dough going weekly and am happy to say, we are hardly ever more than a bake away from fresh sourdough baguettes. You can leave this in the fridge until you are ready to bake it. I’ve left mine a week before and it was still perfectly delicious and not too sour. They have a crispy crust with a soft and chewy center that will satisfy even experienced bakers!

This recipe makes 3 Italian style baguettes and only requires 3 hours of rising and some stretch and folds before you can tuck it away in the fridge for any day you have time to pull them out to shape and bake them. It only has 5 ingredients and really is a no fuss recipe. Once you’ve made it a couple of times you could make it by memory, it’s that simple. I hope you try it and let me know how it turns out for you in the comments. These easy no knead sourdough baguettes need anywhere from 12 hours up. They will need an overnight ferment as well as a couple hours to shape and rise before baking, but most of the time is hands off with these. Trust me- if I have time to keep these on rotation in our menu, you can too.

Ingredients needed for these easy sourdough no knead baguettes
- flour
- sourdough starter
- water
- sugar
- salt
Optional but helpful tools
- My favorite large capacity kitchenmaid mixer
- My favorite serrated bread knife
- baguette baker
- baking stone
- flour shaker
- baking sheet
- dough scraper
- dough cutter
- bread lame for scoring
- parchment paper
This post contains affiliate links, which means I make a small commission at no extra cost to you. Thank you for supporting my blog! See my full disclosure here.
Steps for making these easy no knead sourdough baguettes

- This is the easiest part. You’re just going to mix all of your ingredients until well combined. If you’re doing this with a mixer you can beat it for a few minutes, but it’s not necessary.

2. Next up is the stretch and fold session. Don’t leave! This is not complicated. All that it requires of you is to be home long enough. After the dough is mixed you’re going to cover it and leave it for an hour. Don’t worry if it’s over or under that time by a bit. After an hour just pull up each side of the dough and sort of wiggle and stretch it up until it feels like it might break off and then fold it back up on top of itself. Go around the dough ball on each side. Then leave it again for an hour. You’re going to do that 2 more times for a total of 3 stretch and folds. For a more detailed video on stretching and folding see here.

3. Fermenting- Now you’re going to tuck that sweet little loaf in for a long nap, as I tell my kiddos. Cover with plastic wrap and put in the fridge for 8 hours up to a week. Yup, a week is still totally fine. I’ve done it tons of times. The flavor really develops the longer you wait. Plus, the longer you can leave it, the more benefits you’ll get from the sourdough. This is not a quick recipe, but it is simple, doable and easy. You only need time.

Bake day: shaping these easy no knead sourdough baguettes
1. Quick Rest- Pull the dough out of the fridge and let it rest for 30. min to warm up a bit. I’ve jumped right into shaping them and they still turned out just fine though. If you let them sit a bit though the dough will be easier to handle and shape.

2. Shaping- Now that your dough is more supple from the rest, it’s time to shape it. I like to use a dough scraper to get all my dough out of the bowl. Next cut 3 sections with a dough cutter. A serrated bread knife will also work for this recipe. (As you get comfortable with the recipe, feel free to shape a boulé or 4-6 smaller French baguettes.) For ease of baking, I use a baguette pan. An alternative would be to use a bread couche or you can roll foil into logs and lay underneath parchment paper on a baking sheet in between your baguettes to keep them from spreading. (see the pic below) Otherwise you can shape the loaves and lay on parchment paper. Shape the loaves with the following instructions: (another helpful video here)
- On a flourless surface, flatten one section into a rectangular shape with your hands. Just as big as you can comfortably get it with your hands only- no rolling pin needed.
- Fold it in thirds like a letter. Flatten it down once again.
- Now fold it in half the same direction this time keep a seam side, pinching as you roll, and tuck the dough around onto counter back and forth with the seam side down rolling into a log about 16″ long.
- Roll each end between your hands to form a sort of point on the ends.
- Place on your parchment ready baking sheet and repeat with the other loaves.
- Cover with plastic wrap or l (I use a bread couche or large trash bag works too.) Let it rest 2-4 hours until almost double.
3. Baking these easy no knead sourdough baguettes-
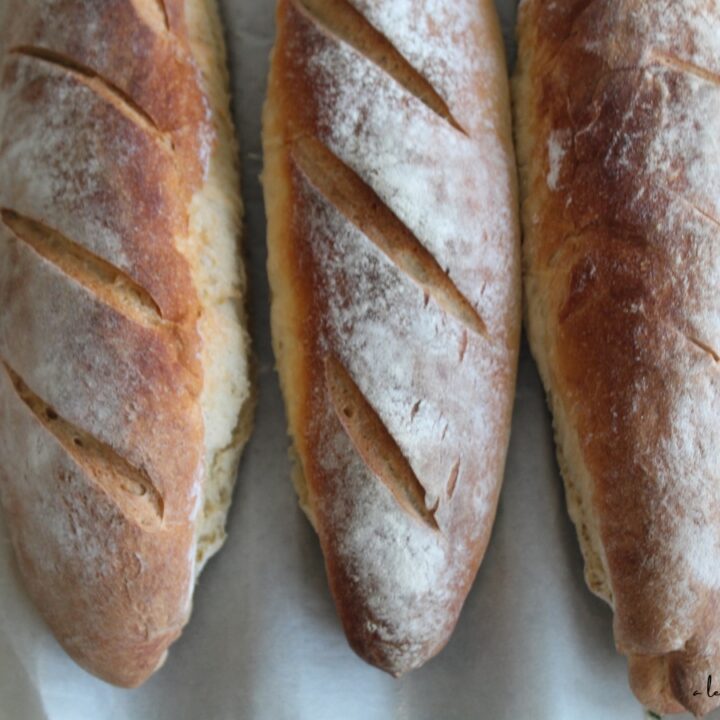
1. Preheat you oven to 500*F about 30 min. to 1 hr. before ready to bake. When ready to bake, sprinkle flour over each loaf and then slice diagonals across the top about 2 inches apart with a lame.

2. Insert the loves on the baguette pan with the parchment directly onto a baking stone, or keep on the baking sheet if you don’t have a stone. Immediately lower temp to 450* and bake for 30 minutes. Check after 30. You want a deep golden to amber color on your loaf to insure a crispy crust and tender inside. You can check the internal temp if concerned. It should be 190-200* when fully baked. Resist cutting into them for at least 5 minutes, if you can. 😉
How to store and freeze leftovers
These baguettes are best eaten fresh otherwise, wrap then in plastic or store in an airtight container. They can be frozen for longer storage (up to 6 months). Wrap them in plastic and them heavy duty foil. Warm them up wrapped in only the foil in the oven.
If your bread is feeling a bit dry and getting old, don’t throw it out! It makes the perfect French toast, French toast casserole breakfast strata, or croutons.

More sourdough recipes
- Easy Cranberry Orange Sourdough Loaf
- Sourdough Pear Coffee Cake for a crowd!
- Long ferment lemon poppyseed sourdough scones
Pin to save & share

Printable Recipe card
Easy No Knead Sourdough Baguettes
Ingredients:
1 cup ripe (fed) sourdough starter
1 3/4 cups lukewarm water
5 cups Flour
1 tablespoon salt
2 teaspoons sugar
1. Mix all of your ingredients until well combined. If you're doing this with a mixer you can beat it for a few minutes, but it's not necessary.
2. Stretch and fold- After the dough is mixed you're going to cover it and leave it in the bowl (or a different one) for an hour. After an hour just pull up each side of the dough and sort of wiggle and stretch it up until it feels like it might break off and then fold it back up on top of itself. Go around the dough on each side. Then leave it again for an hour. You're going to do that 2 more times for a total of 3 stretch and folds. For more detailed instructions on stretching and folding see the full blog post.
3. Fermenting- Cover with plastic wrap and put in the fridge for 8 hours up to a week.
Bake day:
1. Quick Rest- Pull the dough out of the fridge and let it rest for 30. min to warm up a bit. You don’t have to, but it will be easier to handle if you do.
2. Shaping- Now that your dough is more supple from the rest, it's time to shape it. I like to use a dough scraper to get all my dough out of the bowl Then cut 3 sections with a dough cutter, or a serrated bread knife . (As you get comfortable with the recipe, feel free to shape a boulé or 4-6 smaller French baguettes.) For ease of baking, I use a baguette pan. An alternative would be to use a bread couche or you can roll foil into logs and lay underneath parchment paper on a baking sheet in between your baguettes to keep them from spreading. Otherwise you can shape the loaves and lay on parchment paper.
Shape the loaves with the following instructions (a helpful vidoe is on the blog post):
* On a flourless surface, flatten one section into a rectangular shape with your hands. Just as big as you can comfortably get it with your hands only- no rolling pin needed.
* Fold it in thirds like a letter. Flatten it down once again.
* Now fold it in half the same direction this time keep a seam side, pinching as you roll, tuck the dough around onto the counter back and forth with the seam side down rolling into a log about 16" long.
* Roll each end between your hands to form a sort of point on the ends.
* Place on your parchment ready baking sheet and repeat with the other loaves.
3. Proofing: Cover with plastic wrap or l (I use a bread couche or large trash bag works too.) Let it rest 2-4 hours until almost double.
Baking:
1. Preheat you oven to 500*F about 30 min. to 1 hr. before ready to bake. When ready to bake, sprinkle flour over each loaf and then slice diagonals across the top about 2 inches apart with razor, sharp knife or a lame.
2. Insert the loves on the baguette pan with the parchment directly onto a baking stone, or keep on the baking sheet if you don't have a stone. Immediately lower temp to 450* and bake for 30 minutes. Check after 30. You want a deep golden to amber color on your loaves to insure a crispy crust and tender inside. You can check the internal temp if concerned. It should be 190-200* when fully baked. Resist cutting into them for at least 5 minutes, if you can. 😉
**These baguettes are best eaten fresh otherwise, wrap them in plastic or store in an airtight container. They can be frozen for longer storage (up to 6 months). Wrap them in plastic and then heavy duty foil. Warm them up wrapped in only the foil in the oven.
If your bread is feeling a bit dry and getting old, don't throw it out! It makes the perfect French toast, French toast casserole, breakfast strata, or croutons!

Leave a Reply